|
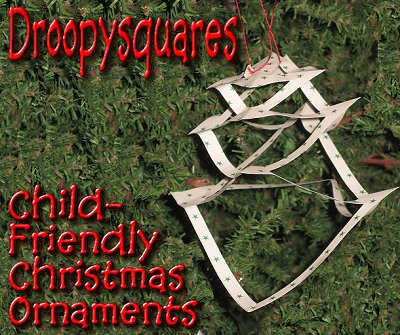
Droopysquares, a Simple Paper Craft, from Family Christmas OnlineTM
This page contains several files you can use to make traditional homemade, color-coordinated Christmas ornaments. These are especially useful for classroom projects. The result is a lacey pattern that reminds some people of pagodas and others of a Christmas tree shap.
Note about Printing - to print these patterns, you will need Adobe Acrobat Reader on your system - they're pdf files. That way you can print them on any kind of printer and get maximum resolution.Doubleclicking on any of the patterns below will give you a page-sized version that should print nicely on most color printers. Don't select the "shrink to fit" option, though.
Note about Margins - Most printers will leave a bit of white space on one one or more edges, so don't feel bad if yours does, too. That's one reason not to select the "print to fit" setting on your printer. I left enough margin that most printers won't cut off the stars anyway.
Note about Ink Usage - Depending on the kind of printer you have, a full-colored, saturated sheet will cost you between five and twenty-five cents to print. If you are "just" experimenting (or printing a bunch for a class project, consider using one of the patterns with a white background, which will cost you less to print. When you've decided exactly what you want to do, then go for the deep colors. Also, if you have light brown paper, using any of the "white background" papers should give you a primitive "hand-printed" look.
About Permissions - These are for your personal use. You can also print multiple copies for a children's or seniors project, say at home, school, Sunday school, or the Senior Citizens center. You may also link to any page on our site (as long as it isn't "framed" with your page. ) On the other hand, you may not sell these sheets or publish these patterns in any form, on paper, or on the web. Please contact me if you have any questions about permissions or usage. Or if you need a different color combination - I might be able to provide it fairly easily.
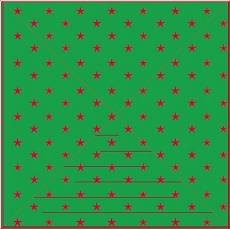
 Droopysquare Patterns Droopysquare Patterns
Okay, Droopysquares is a silly name for this craft, but I don't remember if we ever called it anything better.
If you've already done the Droopycircles craft, these work just the same, only they are a different shape. Like Japanese Lanterns, the Droopysquare and Droopycircle patterns allow you to get three-dimensional results by cleverly cutting a flat piece of paper.
Like Japanese lanterns, this pattern allows you to get a three-dimensional result by cleverly cutting a flat piece of paper. Many readers remember the "how" from their childhood. These instructions and patterns are for those who:
- Don't quite remember, or
- Want a variety of color-coordinated homemade ornaments on their tree (these use the same color families as our Japanese Lantern patterns, or
- Want to teach children to make this kind of ornament.
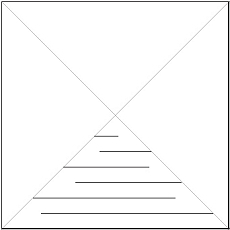
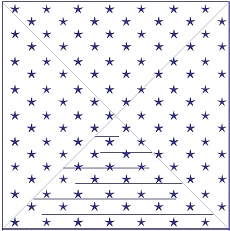
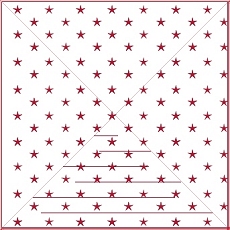
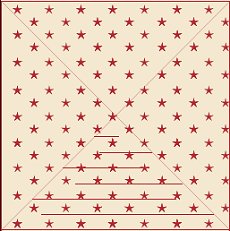
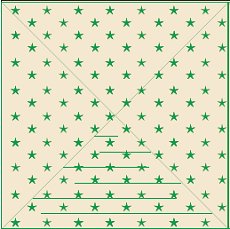
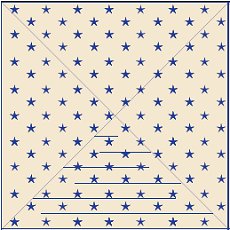
When you click on the blank pattern at the right or any of the colored-in patterns below, you'll get a full-sized pdf file with six droopysquares. (If you haven't done this a while, you might want to practice on the "blank" pattern version at the right.) The instructions following the patterns will help you print and create your first droopysquare.:
- Select the printer icon on the Adobe Acrobat Reader screen. You'll get a print menu that will allow you to tweak some options. Go to properties and set the printer to its maximum quality, then make certain that none of the "resize to fit" options are selected. Then print.
- If you wish to maximize to color effect, look for a matching or coordinated Microstar pattern from our Wrapping Paper page, and print that on the back of the pattern sheet. If you're not certain which way to put the sheet into your sheet feeder to get it to print on the second side, you can always experiment by putting a tiny mark on the edge of the "top side" of the sheet as you stick it in. That way, you can still use whatever prints out, but you can tell which way your pattern sheet should go back in to keep the Microstar wrapping pattern from printing over the droopysquare pattern.
- Cut out one square to start. (Of course if you're doing this for a bunch of people, a judicious use of a paper slicer will help you work quickly.)
- Fold the square you cut out diagonally along one of the long diagonal lines. You should have a large triangle.
- Fold it again, making sure that the side with the little lines stays on the "outside." You should have a small triangle.
- Carefully cut each of the little lines, starting at the folded edge and stopping when the line stops.
- Unfold the droopysquare gently. This is usually complicated, since the corners of the cut pieces get caught on each other.
- Fold the smallest corners in the center of the droopysquare inward. This gives you a sort of "handle" to hold onto the middle.
- Locate the two opposite outside corners that are mostly "cut away" from the rest of the droopysquare.
- Bring the two corners together and pinch them in one hand.
- Holding the center of the droopysquare with the other hand, pull the droopysquare apart. NOW you remember how it works, don't you? You may hang the droopysquare by running a string through the openings at the center or by poking a hole in the very middle and
 If you want your droopysquare to look more like a finished ornament, make two of them, then glue the "longest" tips of the squares to each other, "clamp" them together with paper clips, and let them dry before you fully exend them. If you want your droopysquare to look more like a finished ornament, make two of them, then glue the "longest" tips of the squares to each other, "clamp" them together with paper clips, and let them dry before you fully exend them.
- Once you (or your students) have done one or two of these, you won't really need a pattern to know how to do the next one. On the other hand, if you have students doing these, you can print the blank pattern, then have them color or paint random colors on the opposite side. When they pull their droopysquare "open" at the end, make certain that the colored side ends up on "top."
We Need Your Feedback
If you have used this craft in the classroom or a senior organization, or anything like that, we'd love to have a digital photo or three of our work being put to good purpose. Also, the more positive feedback we get for these pages, the more time we can spend adding new patterns and colors next year. In addition, if you need a specific craft page or color combination, please contact
us - we may have it in the works already and be able to move it up in the queue.
We have several other craft patterns and resources under development. So keep checking back. And contact
us with any questions or suggestions you have in the meantime. Especially contact us if you have any craft ideas you'd like to share with our readers.
Paul and Shelia Race
www.familychristmasonline.com
To return to the Family Christmas OnlineTM Home Page, click here.
|


|

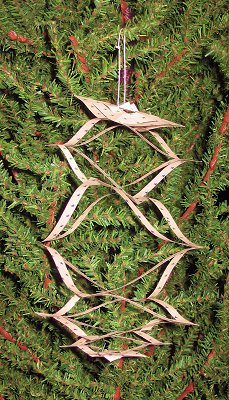 If you want your droopysquare to look more like a finished ornament, make two of them, then glue the "longest" tips of the squares to each other, "clamp" them together with paper clips, and let them dry before you fully exend them.