|
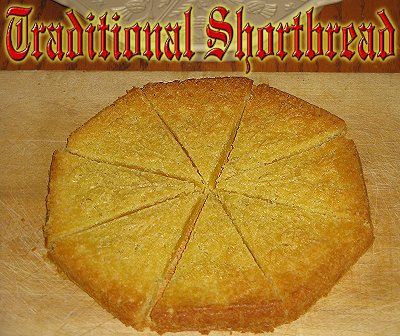
Traditional Shortbread - from Family Christmas OnlineTM
In the old days, "shortening" was the name for any edible fat you would use in cooking, usually butter or lard. (Today it's usually congealed vegetable oil, of course.) Shortbread is called "short," because it has a high percentage of butter or whatever you choose to use. As a result, it is extremely rich in flavor and relatively fragile when fresh. Making it is a little different from making most baked goods, too, since the dough doesn't even stick to itself.
These instructions "fill in the gaps" in most shortbread recipes, by telling you how the dough behaves at each stage of the process, so you won't be afraid you're doing it wrong.
To make this page as useful as possible, we've broken it down into the following subsections:
To complete this project, you will need the following equipment: (you probably already have most or all of it, but I don't want you to have to run to the store in the middle of your project because I've made an unfair assumption about what you have in your kitchen cabinets.)
- A small mixing bowl big enough to hold all the dough you plan to make. A one-quart mixing bowl would be adequate for a batch, anything larger than a two-quart bowl is overkill.
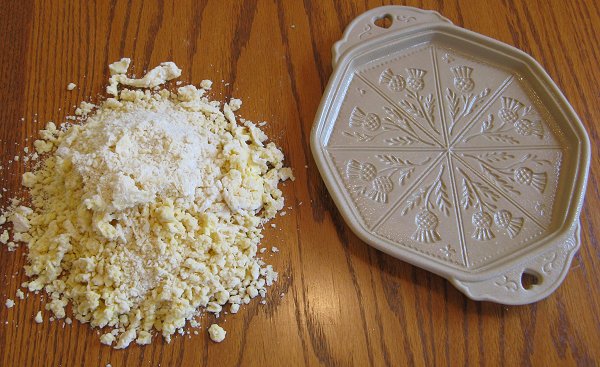
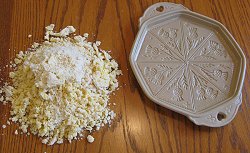
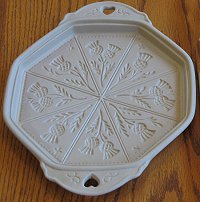 A shortcake mold or substitute. In the photos for this article, I used a ceramic shortbread mold. If you don't have one of these, ceramic cookie molds will do. If you don't have those either, anything you can bake in that is about 8" in diameter or 8" square will do. It is especially helpful if you have something shallow, say 3/8" deep - this makes it easier to spread the dough into the "mold." A shortcake mold or substitute. In the photos for this article, I used a ceramic shortbread mold. If you don't have one of these, ceramic cookie molds will do. If you don't have those either, anything you can bake in that is about 8" in diameter or 8" square will do. It is especially helpful if you have something shallow, say 3/8" deep - this makes it easier to spread the dough into the "mold."
- A wooden cutting board. It is helpful if the board is only a little larger than your mold, but if you have a big one, you can still use it.
- A 1/3 cup-sized measuring cup
- A 1/4-teaspoon sized measuring spoon
- A rubber or vinyl spatula that is relatively firm
- A can of spray vegetable oil (like Pam)
- A smooth surface where you can knead the dough
- An oven. Okay, I know that should be obvious, but I had to say it somewhere.
- An electric mixer. We use a hand mixer. I suppose you could do it by hand, but you're supposed to "cream" the butter and sugar, and that takes a while to do by hand.
- Container(s) - used to store or to give away the finished shortbread pieces.
Although I usually make two shortbread batches on the days when I'm baking, I only have one shortbread mold, so I only mix a batch at a time. This is the most basic shortbread recipe I know, and my favorite. Hundreds of other recipes are out there. But the basic ingredients are usually the same, so this is a good "starter" recipe for you to try.
- 1 cup of butter at room temperature - Margarine works better for me, don't tell anybody. Reduced fat margarine may not work, because it has water in it that can make your project even harder to get into or out of the mold properly.
- 1/3 cup of unsifted powdered sugar
- 1/4 teaspoon vanilla
- 1 cup flour
The first time you do this, you will think you're doing it wrong. Don't worry, follow the instructions, and you'll be fine.
- Stir the butter until it is light and "fluffy."
- Mix in the powered sugar, then the vanilla, stirring to keep it light.
- Mix in the flour. Up until now it looked like the way most cookie doughs do starting out. But when you mixed in the flour, it broke into little globs. Keep mixing until it is mixed "through," but don't expect it to go back into a single lump of dough until you work it into the mold below.
- Preheat the oven to 325F.
- Grease the shortbread mold lightly. If you have a non-stick vegetable oil spray (like Pam), this is the best, because it lets you get into all the crevices of the mold. If you don't, rub shortening into the surface, making sure to get a little into each indentation. If there is a lot of excess on the surface, wipe the surface of the mold lightly with a clean, lint-free dishcloth.
 Dump the dough out onto a surface to knead it. You'll notice that it looks more like a bunch of little chunks than a single lump of dough. Your job will be to try to make it into a single lump of evenly-mixed dough, or at least to combine as many of the chunks as you can. This is messy, no matter how you do it. I usually remember to grease my hands up with shortening before I start, but some will stick to your hands regardless. It helps to be able to call on a second person who can use the spatula to scrap the dough back off your fingers when you're done, so you don't waste too much. If you don't get the dough all into one coherent glob, that's okay for now. Dump the dough out onto a surface to knead it. You'll notice that it looks more like a bunch of little chunks than a single lump of dough. Your job will be to try to make it into a single lump of evenly-mixed dough, or at least to combine as many of the chunks as you can. This is messy, no matter how you do it. I usually remember to grease my hands up with shortening before I start, but some will stick to your hands regardless. It helps to be able to call on a second person who can use the spatula to scrap the dough back off your fingers when you're done, so you don't waste too much. If you don't get the dough all into one coherent glob, that's okay for now.
- Pile the dough onto the mold and wash your hands.
- Use
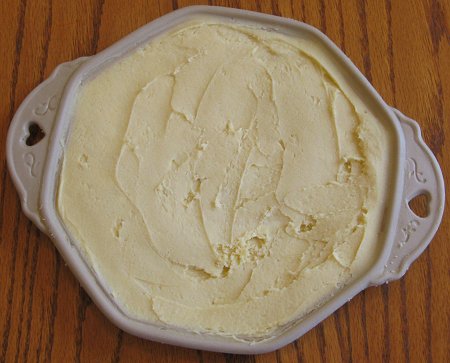
 the rubber spatula to spread the dough forcefully so that it fills all of the indentations. Apply pressure downward - this forces the chunks to meld together. Add any dough that you didn't get into the mold at first. the rubber spatula to spread the dough forcefully so that it fills all of the indentations. Apply pressure downward - this forces the chunks to meld together. Add any dough that you didn't get into the mold at first.
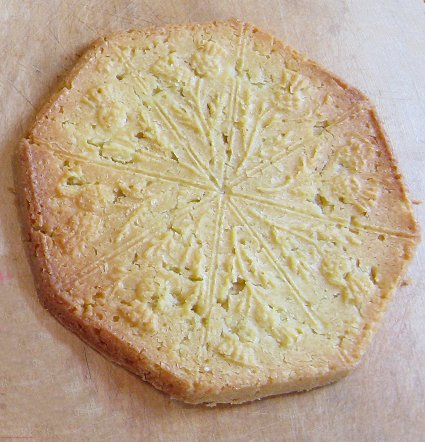
- Smooth the dough into as even a surface as you can. As you push down, the little chunks should congeal at last into one solid mass, which will look rather like pale butter.
- Poke little holes all over the surface with a fork.
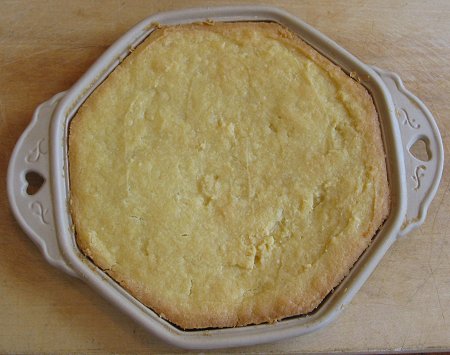
- Stick the mold into the oven on a middle shelf. Set the timer for 30 minutes. Don't take the shortbread out until it has lightly browned, which may take a few minutes more.
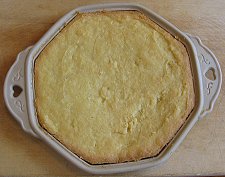 You're supposed to take the shortbread out when it has "lightly browned." To me this means that, not only have the edges darkened a little, but the middle part has changed color a little from the "butter-and-flour" color you started with. You're supposed to take the shortbread out when it has "lightly browned." To me this means that, not only have the edges darkened a little, but the middle part has changed color a little from the "butter-and-flour" color you started with.
- Let the mold cool for several minutes - I like to set the whole thing on a wire rack or something so it cools quickly.
- Just as the mold becomes cool enough to touch, use a knife to loosen the edges of the shortbread all the way around. Go gently - it is very fragile at this stage.
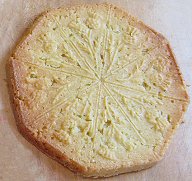 Most recipes say to flip the mold over onto a wooden cutting board. If you try this, do it very gently. I like to put the cutting board on top of the mold, flip the whole thing over, and then pull the mold up slowly, to make certain the shortbread has released properly. Most recipes say to flip the mold over onto a wooden cutting board. If you try this, do it very gently. I like to put the cutting board on top of the mold, flip the whole thing over, and then pull the mold up slowly, to make certain the shortbread has released properly.
- If the shortbread hangs, try tapping the mold.
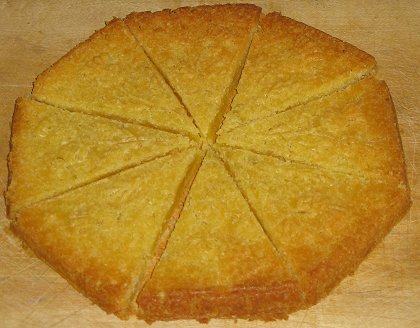
- Once your shortbread is safely on the cutting board, it's time to cut it. Remember, it is still fragile - if you try to force a knife through it in a single pass; it may probably break in the wrong places. Also, you can't cut out a wedge at a time - that puts pressure on the remaining shortbread in two different directions, doubling you chance of breaking it the wrong place. You need to cut whole sections apart along the lines, then divide each subsection apart.
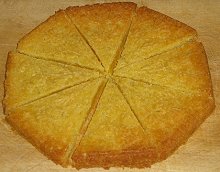 Since I use a round mold divided into eight wedges, I start by lightly drawing a knife across one diameter line, and repeating, going a little deeper each time. This doesn't cut the halves apart as much as it "nudges" them apart. Once the shortbread is divided into halves, you can safely cut off a piece at a time - just go slowly. Since I use a round mold divided into eight wedges, I start by lightly drawing a knife across one diameter line, and repeating, going a little deeper each time. This doesn't cut the halves apart as much as it "nudges" them apart. Once the shortbread is divided into halves, you can safely cut off a piece at a time - just go slowly.
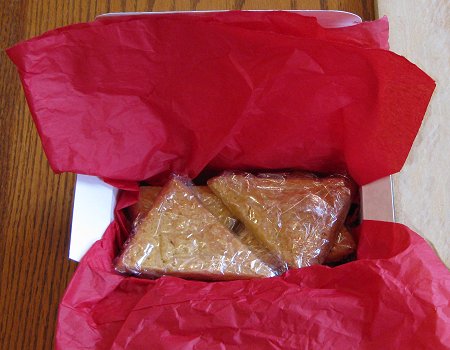
- After the shortbread has cooled, you can wrap it for gifting or put it into an airtight container for storage. In the photo below, I wrapped the pieces individually in Saran Wrap, then stacked them gently into a gift box.
Conclusion
 Once you've learned the "gotchas" of making this treat, you'll be able to do the next one much more quickly. And people who've never learned the "gotchas" will be impressed that you've accomplished something they find tricky. Once you've learned the "gotchas" of making this treat, you'll be able to do the next one much more quickly. And people who've never learned the "gotchas" will be impressed that you've accomplished something they find tricky.
Best of all, the final product tastes great and stores reasonably well, so it makes great gifts. Now where are those OTHER shortbread recipes?
To return to the Favorite Christmas Cookies page, click here.
To return to the Family Christmas Recipies page, click here.
To return to the Family Christmas OnlineTM Home Page, click here.
|

 |